Affiliate Disclaimer
We sometimes use affiliate links in our content. This won’t cost you anything, but it helps us to keep the site running. Thanks for your support.
Despite suggestions and support from her green-thumbed mom and siblings, Holly just can’t get her garden to bloom. She waters and fertilizes and uses all the right gardening tools, but her daffodils don’t grow, and her daisies keep drooping. Armed with a positive attitude and unwavering perseverance, Holly finally realizes that she does not need to grow flowers with soil and seeds to be a success. Inspired by her artistic father, she taps into her natural creative abilities and surprises everyone by growing her own unique garden—from paper, paste, pipe cleaners, and paint.
from Holly Bloom’s Garden at amazon.com
Thanks to Diana Bartch for writing the lessons for this Holly Bloom’s Garden unit study.
Holly Bloom’s Garden Unit Study Lessons
This unit study includes lessons and printables based on the book Holly Bloom’s Garden by Sarah Ashman and Nancy Parent.
Here are some sample lessons from the Holly Bloom’s Garden Unit Study:
Parts of a Flower: Dissect a flower as you describe the different parts and what they are used for. A lily is recommended because it is easy to distinguish the different parts.
Petal: This is what attracts the insects to the flower so pollination can occur. Usually brightly colored and there can be one petal to many petals.
Stamen: These contain the anther (pollen sacs) and filaments (hold up the anthers).
Carpel / Pistil: This contains the ovary (holds the eggs), the style (tube on top of the ovary) and the stigma (covered in a sticky substance because it collects the pollen).
Sepal: The little leaves at the base of the flower. Protected the flower when it was a bud.
Some flowers, called perfect flowers, contain all the parts listed above. Others, called imperfect flowers, contain only a carpel or a stamen.
Types of Flowers: Perennial and annual are two common words used to describe flowers. Perennial flowers are flowers that live longer than one growing season. Annuals on the other hand grow, seed, and die in one season. Another type of flower is a biennial. These flowers live for two years–the first year they grown, the second year they flower and go to seed and then die.
Gardening Tools: Using the Right Tool
Many different jobs that we do (cooking, cleaning, working on a car, etc.) require a special set of tools. Discuss some of these as applicable in your student’s life.
In this story, we see various garden tools used.
In the garden, the family is shown with hoes and trowels. The sister is wearing what looks like waterproof shoes. The mother is wearing gloves and using snips (hand held pruners) to cut roses. Each person is wearing hats. On the next page, sister Rosie is shown at a potting bench, wearing gloves and potting up plants. On the shelves of the potting bench and on the ground nearby are clay and metal pots, potting soil, trowels, gardening forks, extra gloves and an extra hat.
Later in the book, her brother Bud tells her ” ‘You need to find the right tools.’ So Holly looked in the shed.” She uses a hoe and then a trowel. The shed is filled with all kinds of gardening tools–ladder, loppers, garden stakes, etc. Holly is shown as having just got out a spade, tamper, and rake. Her brother has a shovel. Holly’s pockets are filled with a trowel, gardening fork, and a (hand-held) cultivator. Outside the shed is a wheelbarrow.
Is your student familiar with any of these tools? Take some time to teach your student about basic garden tools.
You can grab a copy of the entire Holly Bloom’s Garden Unit Study and Lapbook in an easy-to-print file at the end of this post.
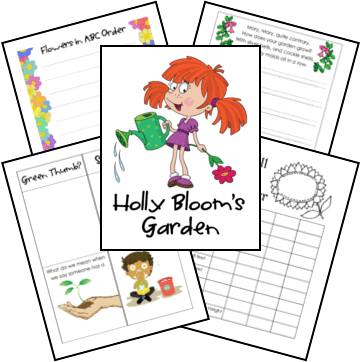
Holly Bloom’s Garden Lapbook Printables
In addition to the unit study lessons, this file includes a Holly Bloom’s Garden lapbook with these mini-books and printables:
- Character Names Simple Fold Book
- My Copywork Simple Fold Book
- As Tall as a Sunflower Graph
- Alliteration Shutterfold Book
- Green Thumb Matchbook
- Sneezing Matchbook
- Garden Tools Accordion
- Parts of a Flower Diagram
- What to Wear in the Garden Mini-book
- Flowers in Alphabetical Order Activity Page
- Flower Jokes Cards & Pocket
How to Get Started with Your Holly Bloom’s Garden Unit Study & Lapbook
Follow these simple instructions to get started with the Holly Bloom’s Garden Unit Study:
- Buy a copy of the book, Holly Bloom’s Garden, or borrow one from your local library.
- Print the Holly Bloom’s Garden unit study.
- Choose the lessons you want to use with your student (a highlighter works great for this).
- Choose and prepare the lapbook printables you want to use with your student.
- Enjoy a week of gardening, creating, crafting, and blooming!
Get Your Free Holly Bloom’s Garden Unit Study & Lapbook
Simply click on the image below to access your free Holly Bloom’s Garden Unit Study and Lapbook.
More Garden Themed Resources