Affiliate Disclaimer
We sometimes use affiliate links in our content. This won’t cost you anything, but it helps us to keep the site running. Thanks for your support.
Thanks to Celia Hartmann and Jimmie for writing the lessons and lapbook for this The Great Kapok Tree unit study.
The Great Kapok Tree Unit Study Lessons
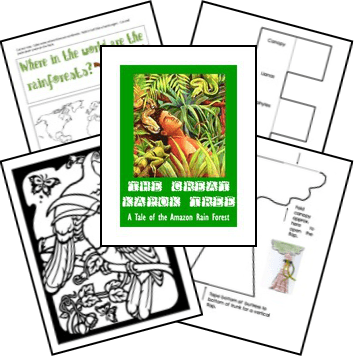
This unit study includes lessons and printables based on the book The Great Kapok Tree by Lynne Cherry.
Here are some sample lessons from the The Great Kapok Tree Unit Study.
Geography: Amazon Rain Forest
Explain to your student that a tropical rain forest is an environment that has lots of tall trees and receives lots of rain (160 to 400 inches each year!). Show him on a globe that tropical rain forests exist in Africa, Australia, Asia, and Central and South America. The Amazon Rain Forest is in South America. Show him the continent and the country of Brazil. The country of Brazil is slightly smaller than the entire USA. Point out the Amazon River. The Amazon River is the second longest river in the world, but has the most water flowing in it.
Science: Rain Forests
Does your child know what a habitat is? It is an environment in which plant and animal life live together naturally, relying on each other for sustenance.
The rainforests, found in Africa, Australia, Asia, and Central and South America, receive 160 to 400 inches or rain each year! The rainforests are very special habitats and the world would not be the same without them.
Rainforests have four different layers (refer to picture inside cover of book), each layer being home to specific plants and animals. These plants and animals work together to create a livable environment, providing each other with the food and shelter. We will discuss each layer, and the plants and animals that live within each. As you discuss each layer with your child add the plants and animals to the appropriate pages in the layer book.
The very top layer of the rainforest is called the Emergent layer, or Penthouse. This layer includes the tallest trees of the rainforest, such as the Kapok and Coco de Mono, which can grow over 150 feet tall, peaking up over all the other rainforest vegetation. The trees living in this top layer have very shallow root systems, and depend on the lower growth to support their massive trunks. The tops of Emergent trees are wide spreading (umbrella shaped), and have seeds that hang in pods which explode and open when the time is right, scattering the seeds to the wind. The trees rely on the fruit bats to pollinate them. Other animals living in the Emergent layer of the rainforest include the Morpho butterfly, hawk, Proboscis monkey, and the Harpy Eagle.
The next layer is the Canopy, or the Umbrella. This layer is almost a continuous sheet of green, with sunlight above and near darkness below. In addition to the tall trees, climbers and vines such as moss, lichen, and hundreds of different flowering plants, harmlessly attach themselves to the canopy trees, creating the canopy layer. The animals making this canopy layer their home include the three-toed sloth, toucan, spider monkey, and porcupine.
Underneath the Canopy layer you will find the Understory. The Understory receives sunlight that has filtered down through the Emergent and Canopy layers. The wind and temperature in the Understory stay consistent due to the protection of the upper layers. In the Understory live small trees such as the fig and palm, and shrubs, bushes, and climbers such as orchids and bromeliads. They give shelter and food to the jaguar, ocelot, boa, and various tree frogs.
At the very bottom of the rainforest is the Floor. The Floor is always wet and dark. Very little grows on the rainforest Floor, except for some shade loving ferns and flowers. Mostly, the Floor is comprised of leaves and debris that have fallen from the upper layers. Tarantulas, tapirs, crocodiles, anteaters, armadillos, and many species of insects that work at decomposing the debris inhabit it.
Rain forests are fascinating places and you could probably spend weeks discussing it. Choose some topics of interest and discuss with your child. In addition to the basic information here, you may wish to research and discuss seed dispersal, strangler plants, prehensile tails, deforestation, nature conservancy, endangered animals, indigenous people, medicines, etc.
You can grab a copy of the entire The Great Kapok Tree Unit Study in an easy-to-print file at the end of this post.
The Great Kapok Tree Lapbook Printables
In addition to the unit study lessons, this file also includes the following mini-books for your student to create a The Great Kapok Tree Lapbook:
- Rain Forest Diorama Mini-book
- Snake Circle Book
- Leafcutter Ants Pocket and Leaf Shape Book
- Big Cats of the Rainforest Layer Book
- Bromeliad Shape Book
- Giant Amazon Water Lily Shape Book
- South America Map Book
- Rain Forest Mammals Side by Side Book
- Rain Forest Birds Matchbooks
- Layers of the Rain Forest Tree Book
- And more!
How to Get Started with Your The Great Kapok Tree Unit Study & Lapbook
Follow these simple instructions to get started with the The Great Kapok Tree Unit Study:
- Buy a copy of the book, The Great Kapok Tree by Lynne Cherry, or borrow one from your local library.
- Print the The Great Kapok Tree unit study.
- Choose the lessons you want to use with your student (a highlighter works great for this).
- Choose and prepare the lapbook printables you want to use with your student.
- Enjoy a week of learning all about the rain forest.
Get Your The Great Kapok Tree Unit Study & Lapbook
Simply click on the image below to grab your free The Great Kapok Tree Unit Study and Lapbook.
More Rain Forest Resources
Check out these other related resources.